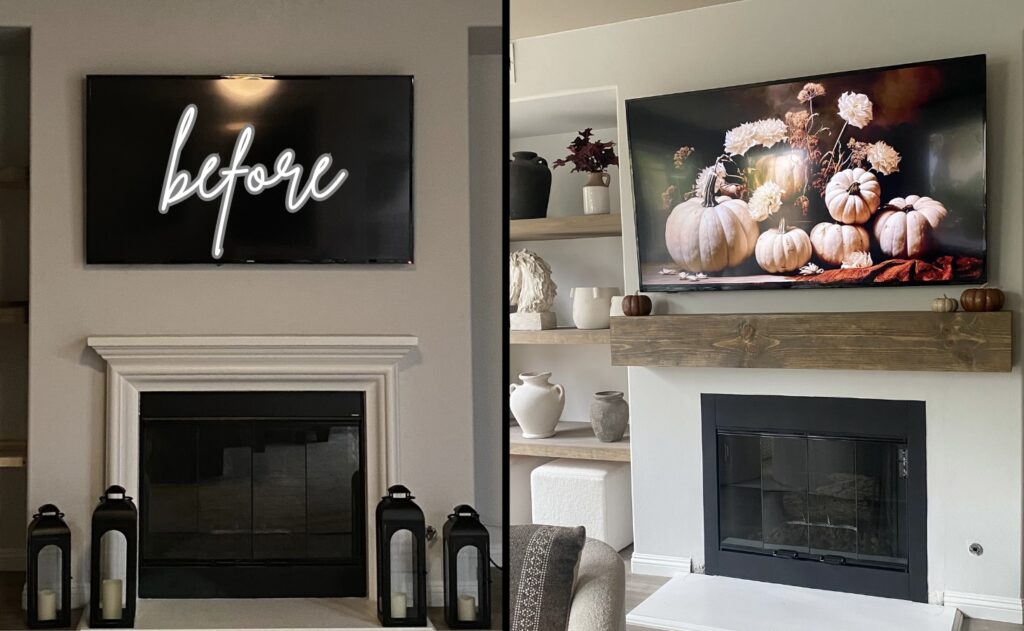
For three years I’ve wanted to do a DIY fireplace makeover on our builder-grade fireplace. There was nothing wrong with the fireplace, but aesthetically speaking, the surround was far too small for the scale of our large living room. It looked dinky, and I knew with some DIY effort we could have a custom fireplace that would match the other improvements we’ve made!
With so many amazing fireplace ideas floating around in this head it took me forever to decide what look I wanted to go for. I also think I waited so long because I was concerned about the unknowable amount of work and drywall repair that would be involved in removing the old fireplace surround. But, after involving my husband and a crow bar for the demo portion and some much-needed Pinterest-ing, I am so happy to report that we LOVE the way our DIY fireplace makeover turned out! In this blog post I will share photos and detail how we did it!
Affiliate links may be used in this blog post, at no cost to you.
Step 1: Remove the Old Fireplace Surround
The first step was removing the old fireplace surround. There was very little information I could find online on the best way to do this. We first tried simply scoring the caulking all the way around the surround with this utility knife, and using a baseboard puller to try and pull it off the drywall, but with no success. In our case, the fireplace surround was screwed into the studs *and* had a thick coating of construction adhesive. For a second we were worried we wouldn’t be able to remove it.
Then we made a trip to the hardware store to grab this 24″ crowbar to get better leverage. It caused a fair amount of damage to the drywall, but we finally got the surround off the wall! Our DIY fireplace makeover was officially underway!
Step 2: Drywall Repair, Texture, & Paint
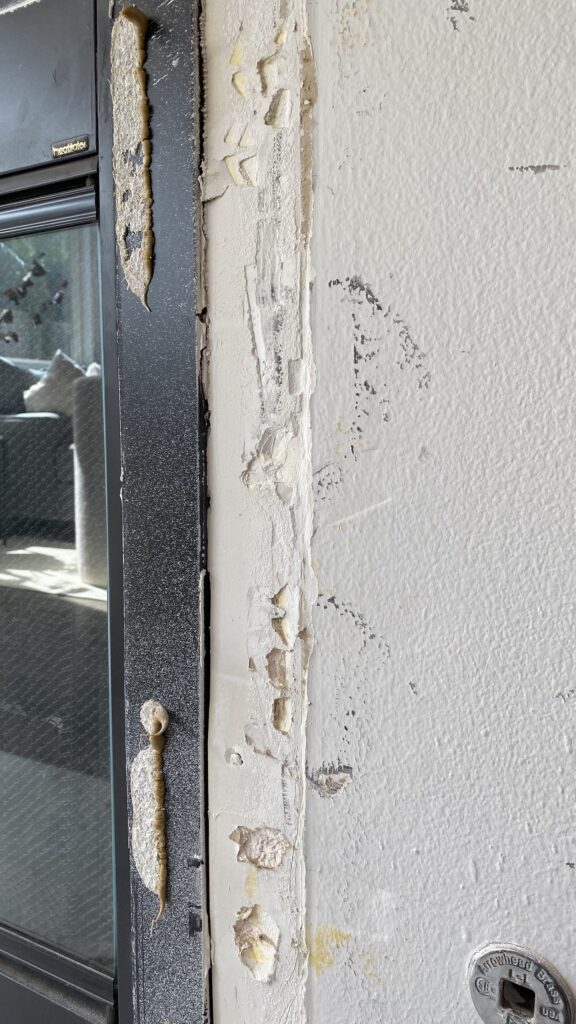
This is what we were left with after removing the old fireplace surround:
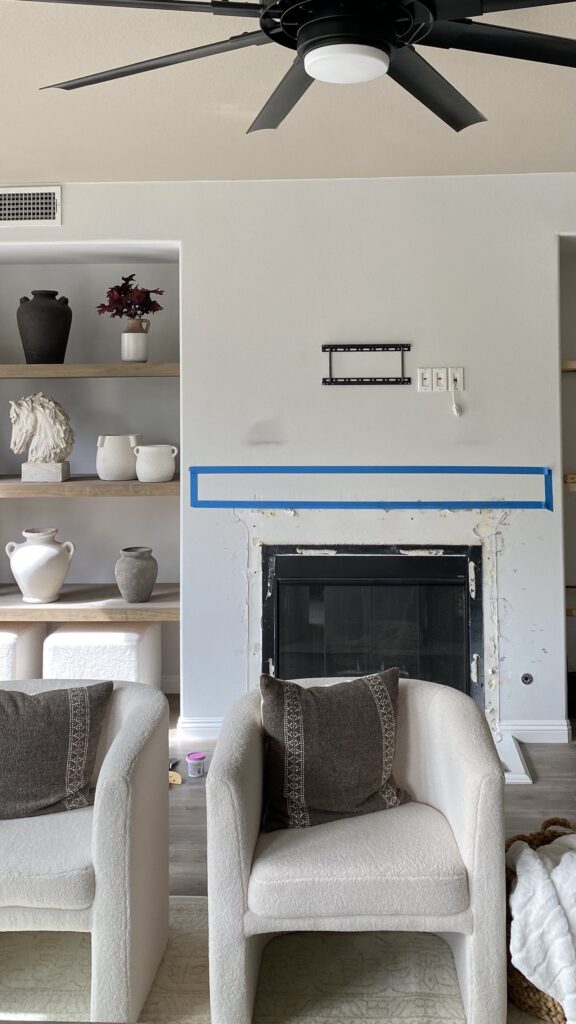
Leveraging the crowbar caused serious dents in the drywall, and globs of hard construction adhesive were left on the firebox. I used my favorite spackle and this paint scraper to fill in the dents in the drywall and then sanded the area using this sanding block. I continued filling and sanding the drywall several times until the area was flush. This was the most tedious part of our DIY fireplace makeover.
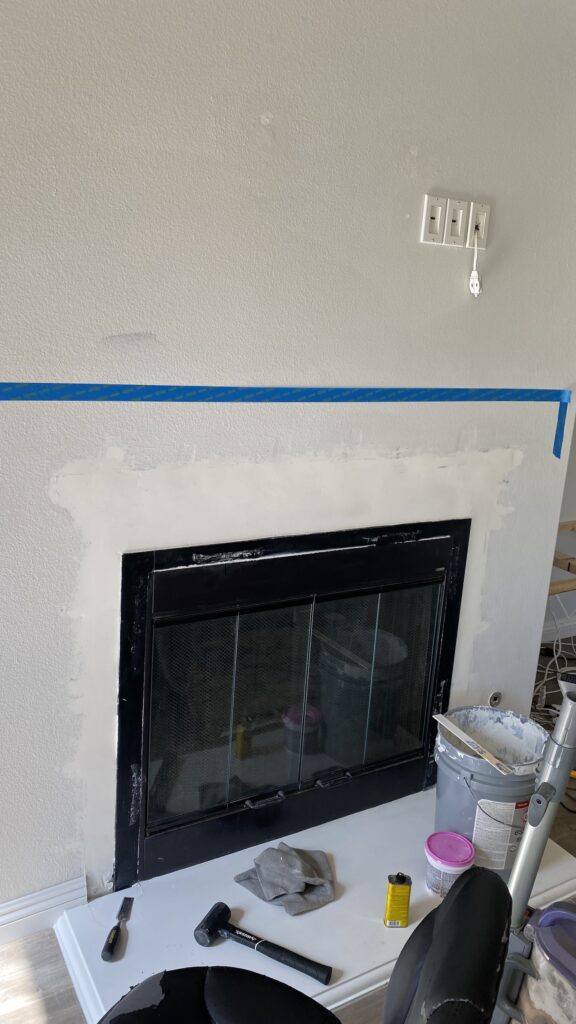
After lightly wiping the wall with a cloth and vacuuming the whole area, I moved on to trying to find a solution to remove the globs of construction adhesive left on the firebox. There was definitely some trial and error, but I found that the only real way to remove the globs was to soak them with this construction adhesive remover and then use a paint scraper. It took maybe 10 rounds of doing this to get all the adhesive off, and it was unavoidable that the firebox got scratched by the paint scraper during the process.
Then I did a few layers of this texture spray on the drywall to match our existing wall texture, and lightly sanded the area again with the sanding block before painting it to match the wall.
Step 3: Spray Paint the Firebox
The original firebox finish had a slight sheen, and I thought updating it to a matte finish would make the whole thing instantly look more modern. And boy did it ever! If you are planning to do the same thing, make sure to go with a high-heat spray paint like this matte black one I used. It also covered all of the scratches we made on the firebox when we were scraping off the construction adhesive. Pro tip: when working with spray paint, it’s better to do several light coats than one or two heavy coats. I ended up doing four light coats of spray paint.
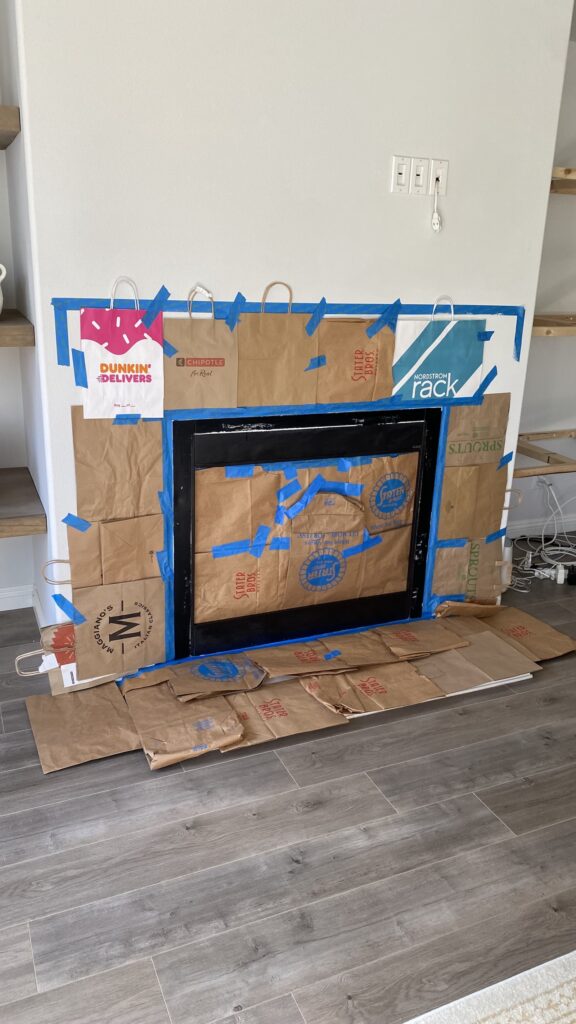
This step of the DIY fireplace makeover definitely required the most prep work. First, I removed the bifold fireplace doors and gave them a good cleaning. Then I wiped down both sides of the screens. The improvement in the look of the fireplace after just those two things was incredible! Then, I used 1000 old paper shopping bags (I knew I was saving those for a reason LOL) and this blue painters tape to protect the glass and the floors. It still wasn’t nearly enough prep. I should have used several of these pre-taped plastic tarps to cover the entire room — the exposed floors, area rug, and the walls next to the fireplace. The overspray is no joke!
Step 4: DIY Fireplace Mantel
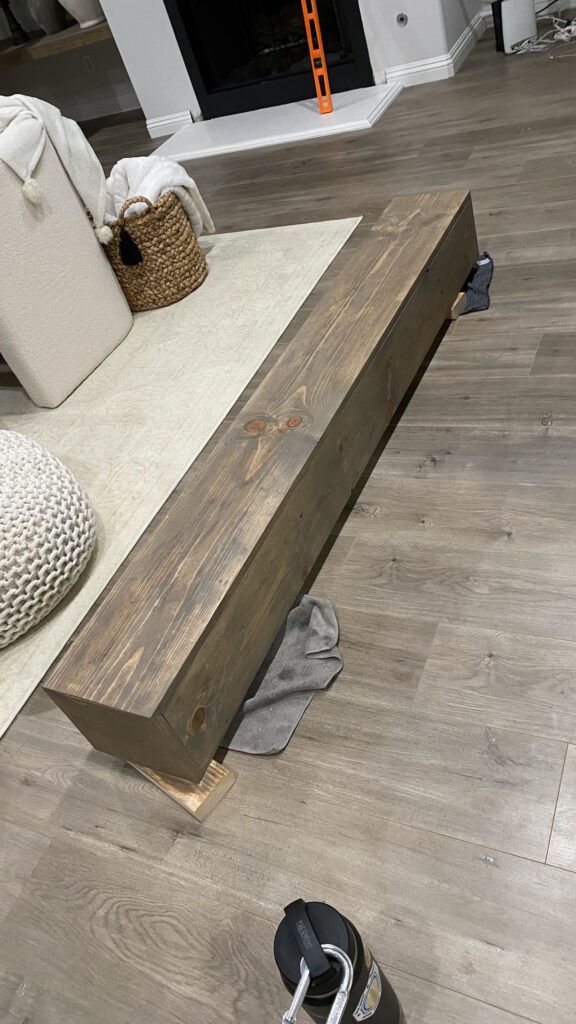
The Design of the DIY Fireplace Mantel
For our DIY fireplace makeover, I wanted a chunky, oversized, and rustic-looking mantel! In coming up with the design, these were my two must-haves: to be able to build it using only my miter saw, and for it to look seamless from the front. In order to achieve both of those things, I used a box construction with 45-degree mitered joints on the front board and side boards, and butt joints where the top and bottom boards meet the front board.
To get a chunky look, I used these 1×8 boards for the top and bottom (for a deep mantel), and these 1×10 boards to create the front and sides (for a thick mantel). The boards are pine (aka “common board”), which is an affordable option, and also offers a rustic look with knots. Pro tip: choose the straightest boards you can find, and make sure you like how they look! In my case I wanted character, knots, and texture.
How to Build a Fireplace Mantel
I started by cutting my front 1×10 board to length with my favorite miter saw. The total length of our mantel would be 70 inches, so I needed the front board cut to that number. After making my first 45-degree inside miter cut on one end, I then measured and marked 70 inches and cut another inside miter. Front board done! Pro tip: before cutting, determine which board and side of that board is your favorite — that should face the front!
Then it was time to cut my top and bottom boards. These will be twins. Fortunately with these boards, no mitered edges are needed, so just simple cuts only! I started by cutting about a quarter inch off of one end of each of the boards. From that clean edge, I then measured and marked 68.5 inches (total length of the mantel minus the thickness of the side pieces x2) and made those simple cuts. Top and bottom boards done!
Lastly, it was time to cut the side pieces using another 1×10 board. These side pieces need to have one flat edge (that will touch the wall) and one 45-degree inside mitered edge. Once installed, the mitered edges on the side boards will align with the mitered edges of the front board, creating the seamless look I want. I started with a 45-degree inside miter cut on one end. Then I measured 8 inches from there (the total depth of the mantel will be 8″) and made a simple 90-degree cut. Pro tip: if you can, try and choose the side and section of the board that will look the most seamless with the character of the front board. Now all of the pieces for the mantel were cut!
How to Distress Wood to Add Character to the Mantel
I sanded all of the visible sides of the boards with this corded orbital sander and this 120 grit sandpaper. Then, to create a rustic look, I beat them up using a hammer and this set of three chisels. I went over the boards again with the sander, smoothing out all of the splinters created by the chisels.
Step 5: Assemble & Stain the DIY Wooden Mantel
The next step was to assemble all of the cut boards together to create the mantel. First, I attached the front board to the top board using five of these trim-head screws spaced apart. Pro tip: trim-head screws sink deeply into the wood, so you can later fill the screw holes in with wood putty matching your paint stain. That makes them almost imperceptible! Then I attached the bottom board to the front board using four trim-head screws spaced apart. This is how the mantel looked at that point:
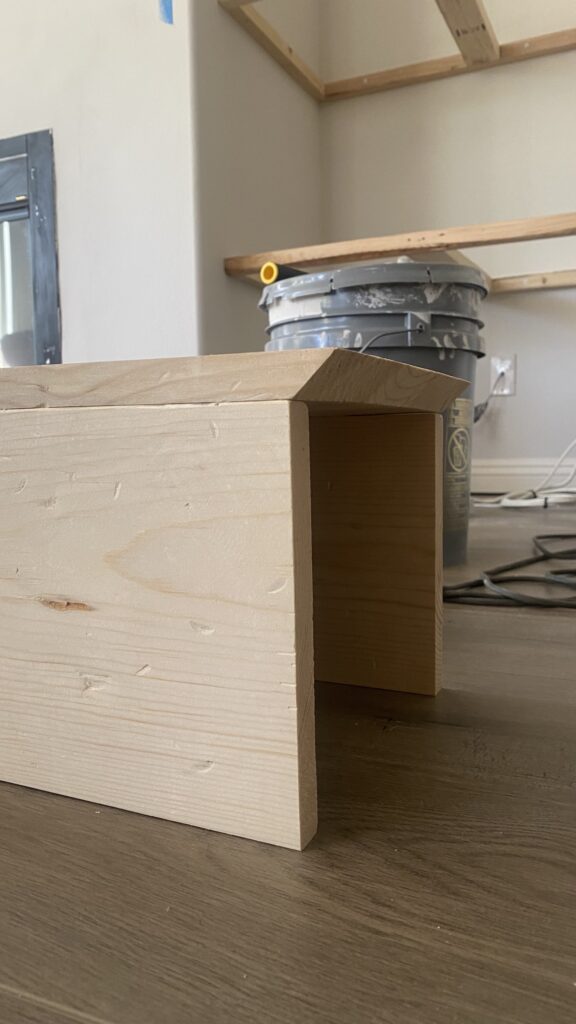
To attach the side pieces, I used two trim-head screws on the top and one on the bottom.
For our DIY fireplace makeover, the mantel needed to coordinate with the floating shelves I built in the nooks on either side. So, I stained the mantel with my same custom stain recipe:
- One layer Varathane Wood Conditioner
- One layer Minwax Special Walnut Stain
- One layer Varathane Classic Grey Stain
- One layer Minwax Weathered Oak Stain
To apply the stain, I used these staining pads, and I left about 30 minutes of dry time in-between layers. About an hour after my last layer of stain, I filled the screw holes with a mixture of this light tone wood putty and this medium wood putty. I rolled together a bit of each on my fingers before pushing the putty into the holes. This technique created an excellent match to my custom stain recipe!
Step 6: Install the DIY Fireplace Makeover Mantel
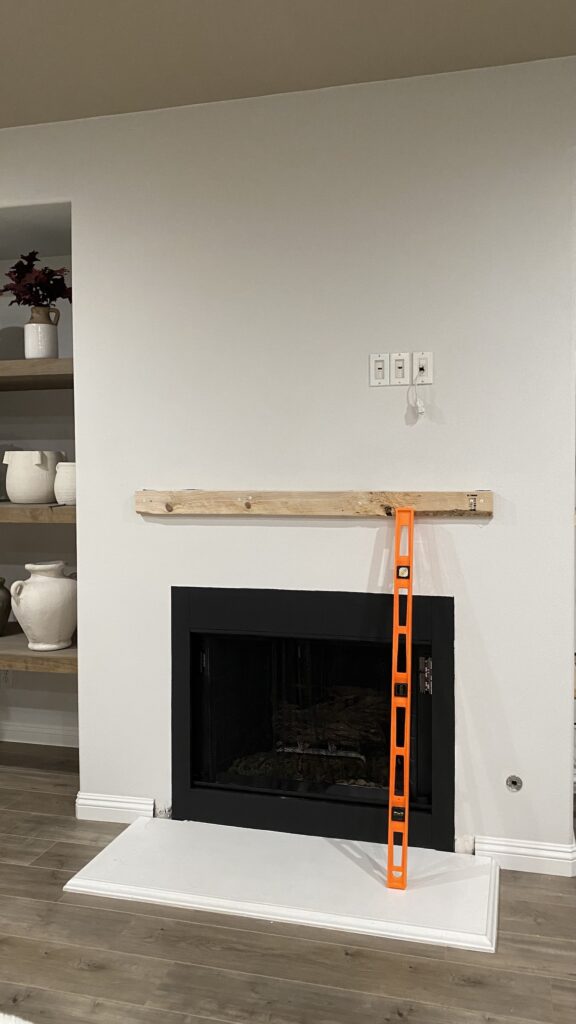
Using a stud finder like this one, we marked the studs on the wall and the height at which we wanted the mantel installed. We grabbed a scrap 2×4 pine board like this one that we already had on hand to use as a cleat. First, we screwed the 2×4 into as many studs as possible with these 2.5″ cabinet screws, while using a 24″ level like this one at the same time to make sure the cleat was perfectly horizontal. Then my husband rested the top board of the mantle on the cleat while I centered it on the fireplace.
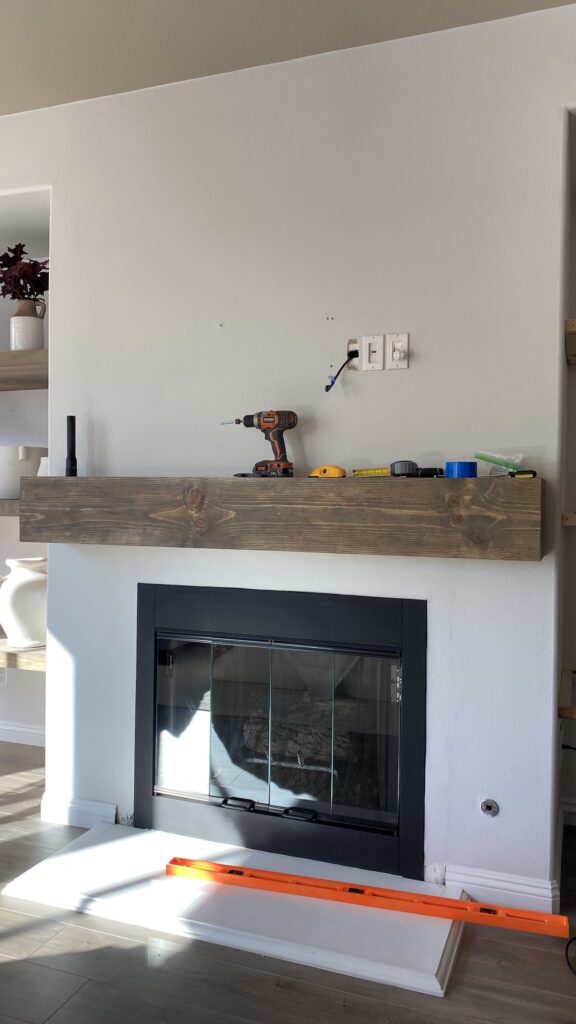
To attach the mantel to the cleat, I used these same trim-head screws that I used to assemble the mantel. We chose not to, but you may want to fill behind the screw holes with the same wood putty mixture to conceal the screws.
Step 7: Install this Amazingly Affordable 70″ TV!
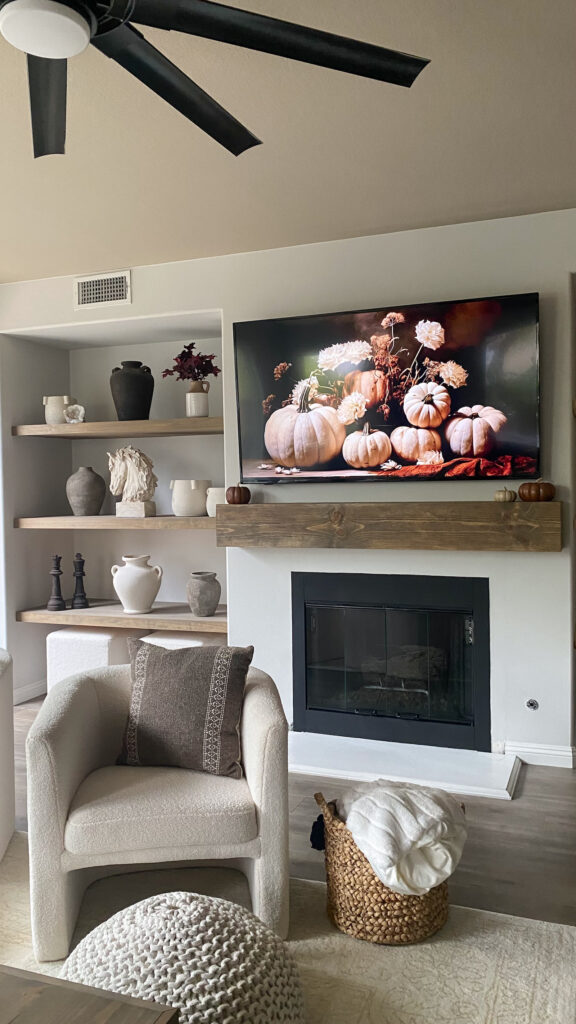
Our previous TV was 8 years old and several of the features were no longer working. It was too small for the scale of the room to begin with, and that would be especially obvious now with our new chunky mantel! I found a steal of a deal on this 70″ TV on sale for under $450! And this amazingly priced tilting TV mount to go with it. This TV was the perfect finishing touch for our DIY fireplace makeover!
Step 8: Repair Baseboards & Caulk
At the time of this blog post, I haven’t actually done this step yet LOL! Removing the previous fireplace surround caused two little gaps in the baseboards. So next up for me is to cut two pieces of baseboard trim to fit in those gaps and caulk and paint the baseboards and hearth to make it look seamless. I’m sure I’ll get to it some point soon, but for now I’m okay with being in the 99% club! I’m loving our DIY fireplace makeover and I’m off to get my chunky new fireplace mantel decorated for Christmas!
I recently shared this video of our DIY fireplace makeover on my YouTube channel.


