Looking to add instant curb appeal and soothing sounds to your porch or backyard? A DIY water fountain might be just the weekend project you need. With just a few simple materials — including a planter, a copper pipe, and a small water pump — I created a beautiful, bubbling fountain that looks custom and sounds like serenity. This is a great option to get the look of a beautiful European/limestone fountain without the price tag!
Affiliate links may be included in this blog post, at no cost to you.
This blog post is all about how to make a DIY water fountain with a planter and copper pipe.
Why Make a DIY Water Fountain?
There’s something magical about the gentle trickle of water on a quiet afternoon. Not only does a DIY water fountain create a calming ambiance, but it also boosts your home’s curb appeal and makes your porch feel like a peaceful retreat. Plus, building one yourself is surprisingly simple — and budget-friendly.
Materials I Used for This Easy DIY Fountain:
- 1 large planter pot with no drainage holes (I used plastic, but other materials also okay)
- 1 3/4″ copper pipe (cut to your desired height)
- A small submersible water pump
- Flex Tape (or waterproof sealant tape)
- A hacksaw (to cut the copper pipe)
- Medium/large rocks to stabilize the pump
- Water (of course!)
Step-by-Step Instructions:
1. Choose Your Planter
Pick a sturdy planter pot that fits your space and aesthetic. I went with this lightweight plastic pot with a textured neutral finish for a European/limestone look, but ceramic or even concrete planters would work just as well. The trick here is to choose a planter that has no drainage holes.
2. Cut the Copper Pipe
Using a hacksaw like this one, I cut the copper pipe to the desired height so the water would bubble just about 6 inches above the rim of the pot. I actually think a couple inches shorter would’ve looked even better. Copper adds a touch of timeless beauty and develops a charming patina over time.
3. Attach the Pipe to the Pump
Here’s the magic: I wrapped one layer of Flex Tape around the pump’s connector before sliding the copper pipe on over it. This made for a snug fit. Then I wrapped another layer of the tape around the base of the copper pipe where it meets the pump to ensure no air could escape through the sides. This quickly created a snug, waterproof seal without any fuss! If you plan to drill through the back of the planter for the plug to pass through, you would want to do that now. I have seen other content creators use flex tape to seal the hole around the cord, but you could also use silicone. I chose not to drill through my planter, and just to conceal the plug cord in other ways.
4. Assemble Inside the Planter
Place the pump at the bottom of the planter, run the copper pipe vertically, and center it. Make sure the pipe is stable — if needed, use decorative rocks, gravel, or pebbles around it for both aesthetics and support. I found large rocks around my yard and put them around the pump to keep it centered and secure.
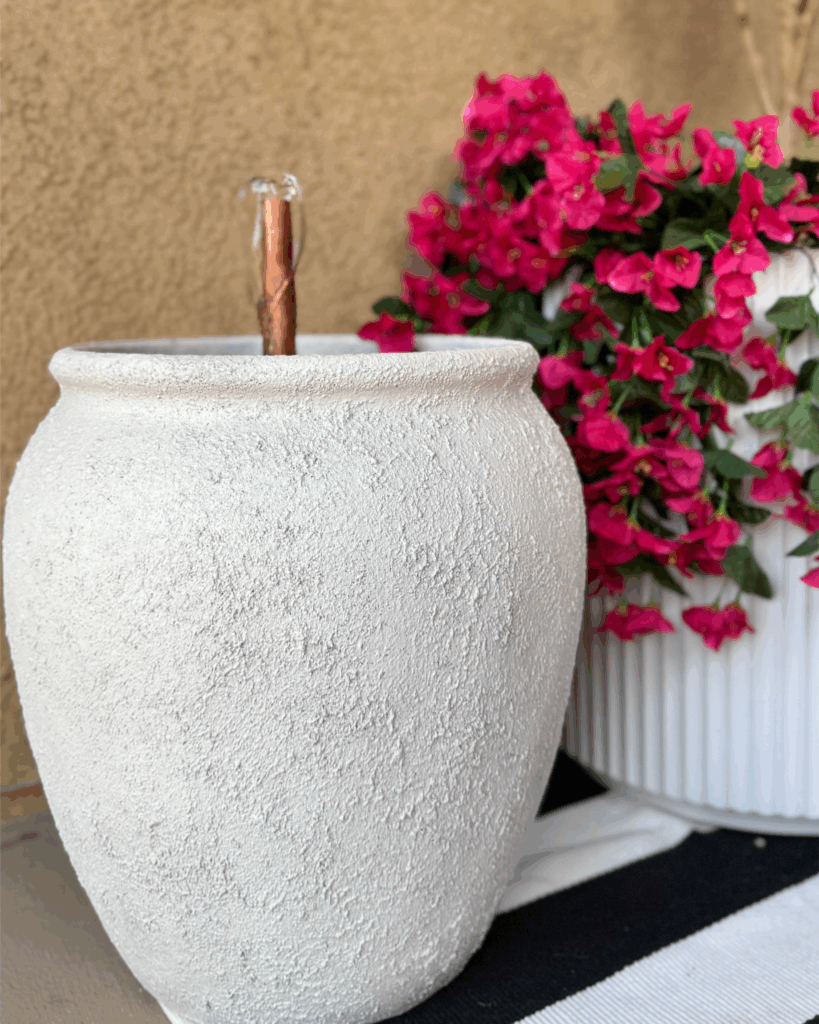
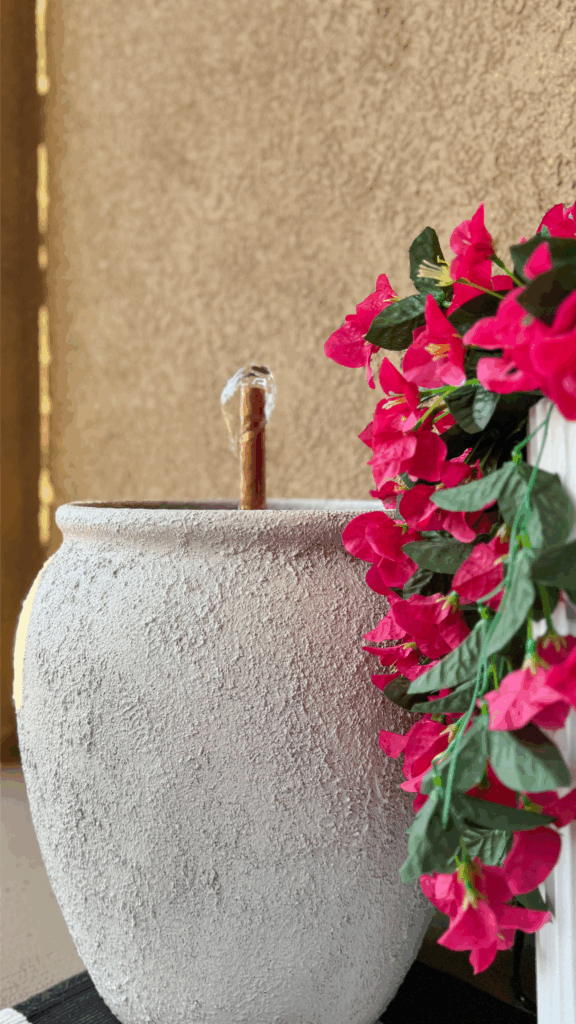
5. Fill and Test
Fill the planter with water, plug in the pump, and enjoy the sound of your very own DIY water fountain!
Tips for DIY Water Fountain Success:
- Use a solar-powered pump like this one if you don’t have a nearby power outlet or don’t want to deal with cords.
- Hide the pump cord behind plants or along porch trim for a cleaner look. My cord hid perfectly behind this faux bougainvillea.
- Add river stones like these around the pump for extra charm.
Final Thoughts
This DIY water fountain project took less than an hour, and now it’s one of my favorite parts of our porch. The soft bubbling sound is incredibly relaxing, and it adds a touch of elegance with hardly any effort and minimal expense. Whether you’re an experienced DIYer or just looking for a simple weekend project, this is a fantastic way to enhance your outdoor space!
Want more DIY project ideas? Read my blog about how to replace your outdated stair spindles with wrought iron, and follow along on Instagram for easy, affordable projects that make your house feel more like home.